|
Please Visit One of the Companies Helping to Bring You the Resource Center!
 |
|
If you'd like to see a
larger picture, just click on the one you'd like to enlarge! You
also see the video of this procedure by
going to
our videos page!
Over the course of a fishing season,
we
get tons of questions regarding techniques and tackle while we're on the
water. Perhaps the most
common one (surprisingly) is what is this knot that I'm always using and how
does one tie it??
Although some might consider it a
'specialty knot', the blood knot is one of the most useful knots
that an angler (either fly or conventional tackle) can know.
|
With good knots, you'll never know what you might
drag up off the bottom of the river! |
|
Tied properly, the blood knot allows
an angler to connect two separate pieces of monofilament line at around
90-95% breaking strength of the line. Some practical uses? Fly anglers use
it all the time to make their own tapered leaders by connecting short
sections of different weight mono to their fly line for a custom leader.
Conventional tackle anglers will the find the knot useful in connecting a
clear leader to a colored line (a very common use for myself).
Don't use colored lines
or flyfish? You can also use the knot to save yourself a few bucks by only
filling the top half of a reel's spool by leaving a layer of underlying line
(call it backing) and connecting it to the new line to be spooled up,
thereby cutting down on the amount of line necessary to fill up the reel.
The keys to tying this knot at fullest
strength possible are: using the same type of line on each side and using
very similar weights (ie 12 lb. to 15 lb. - You can use different types of
line, and bigger weight differences, just keep in mind that your knot
strength will decrease when you do so); and using the proper number of wraps
and pulling the knot tight very slowly.
We'll
give these instructions for a right-handed angler, simply reverse the hands
if you're a lefty.
|
|
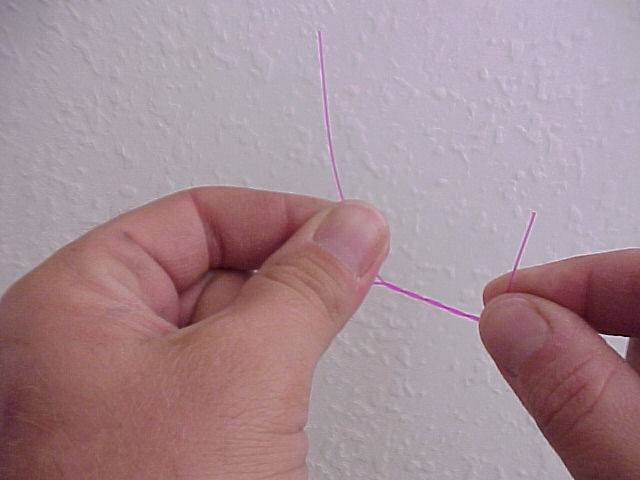
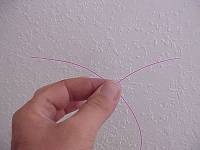
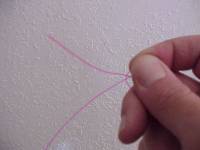
Your
first step to tying this knot is to cross the two pieces of line that you
wish to join in the shape of an 'X'. Make sure to leave four or five inches
of line on each side of you crossing point if possible, this will facilitate
easier tying. |
 |
|
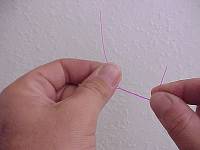
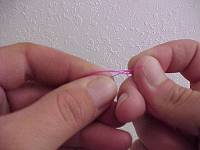
Next, grab the crossing point of the
lines between your left thumb and forefinger and begin winding the tag piece
of line clockwise (looking down the line from left to right) five times. |
 |
|
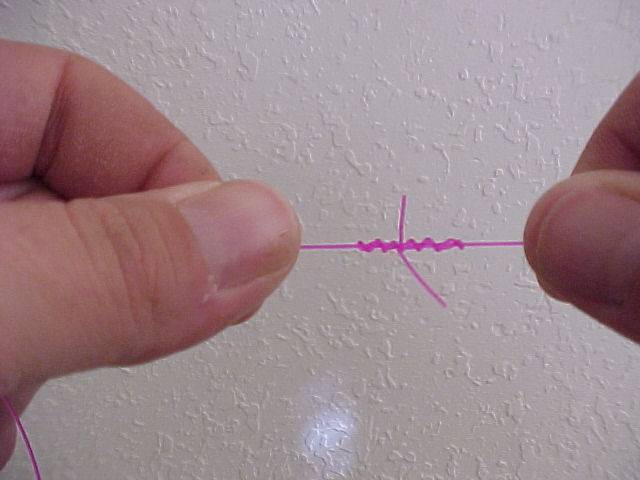
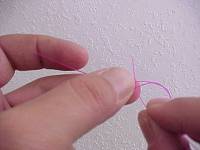
Upon
completion of your wraps, pass the end of the line with which you
made your wraps and slide it into the 'V' that was formed from the
wrapping of the two lines. |
 |
|
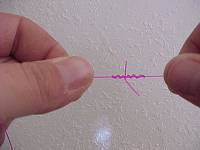
Next, grasp the two crossing lines and
the end that was was just passed through with your right thumb and
forefinger. Then, wrap the remaining tag end counter-clockwise (this is VERY
important) five times around the line. |
 |
|
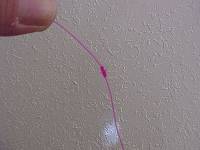
Now pass this tag end through the loop
left behind where the wraps begin. It is very important that you come
through the loop in the opposite direction that the first line did. |
 |
|
For
the next step, I usually grasp the two pieces of line going through the loop
with my teeth and slowly pull on the outer ends of the two lines you are
joining. I firm these up just enough to where the knot tends to hold its
shape. Then, moisten everything well (saliva works just fine :)) and
continue pulling the knot tight. |
 |
|
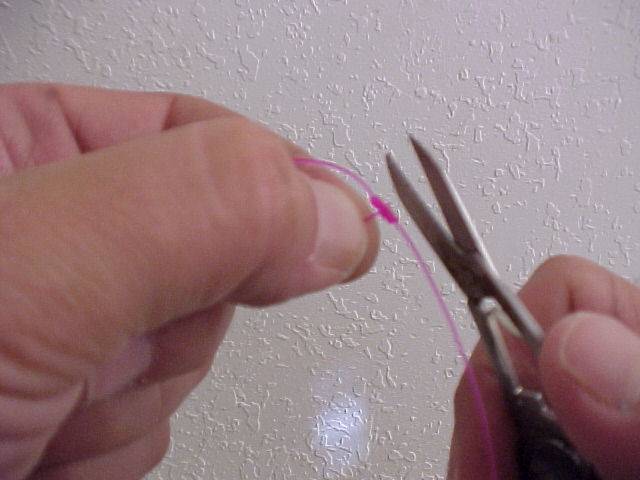
When everything is snug, simply clip
off the the ends of the line sticking out from the knot and you're finished.
Be sure to test your knot by tugging firmly on the line. |
 |
|
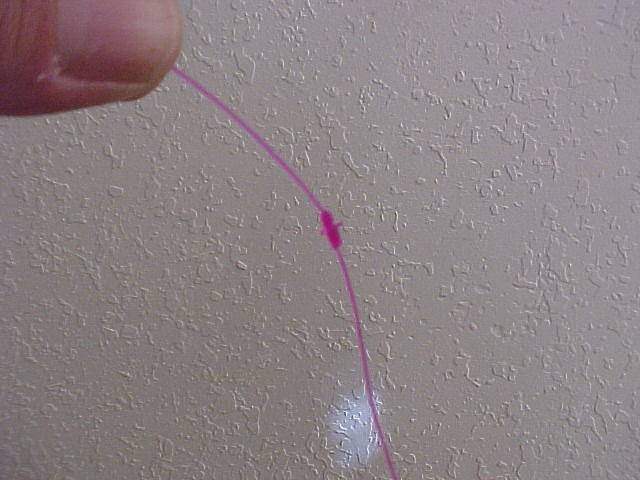
Simple! Yes, it does take a little
practice to tie this knot quickly, but it's an invaluable one that has a
number of uses and should be part of every angler's repertoire of knots! |
 |
|
Remember, if you'd like to see a larger picture, just
click on the one you'd like to enlarge! You also see the video of this
procedure by going to our videos page! |