|
Please Visit One of the Companies Helping to Bring You the Resource Center!
 |
|
The
"Butterfly Style" Salmon Fillet
We get tons of emails from people asking how to
fillet a salmon or steelhead. While many of our fish are released and never make it to the
fillet table (we encourage you to do the same!), those that are retained get the 'butterfly-style' fillet job.
Below, we'll give you a
step-by-step on how to fillet one of those keeper fish. Remember, even with
this diagram, it'll take some practice, and don't fret if you find that you don't get much
meat off the lower rib and belly area of the fall salmon or a winter-run hen ... there
isn't much there to begin with!
This is a neat procedure that will give you one giant
fillet ... both sides attached by the belly meat. Some people like to barbeque the entire
piece ... makes an impressive sight on the 'que for your guests!
|
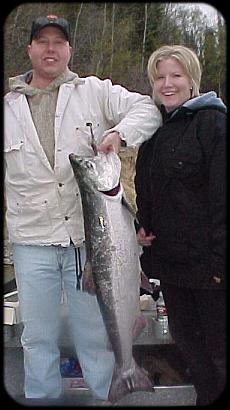
We've got the fish, now what to do with it?? |
|
First of all, make sure that you have a good sharp
knife ... using a dull knife is a sure way to ruin the fillet job and could quite easily
lead to your injury. Filleting is much easier if the fish is NOT gutted as the pressure of
the internal organs on the ribcage makes it easier to cut along the ribmeat. |
|
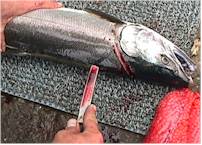
The first cut you want to make is right behind the gill plate ... cut perpendicular
to the length of the fish down to the backbone. Next, turn the knife blade parallel to the
length of the fish and insert level to your cutting surface until you feel the tip of the
knife hit the backbone (see pic on right). Next, carefully cut down the length of the
fish, keep the knife tip on the backbone ... if you lose contact with it, stop cutting and
reposition the tip on the backbone before proceeding.
|
 |
|
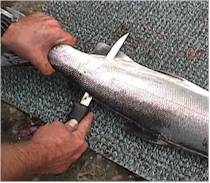
When you reach
an area just in front of the adipose fin, gently push down on the knife handle to lift the
blade just over the backbone and then press down and through the fish as shown in this
picture on the left. Once through the fish, pull the knife towards the tail completing
your initial cut. |
 |
|
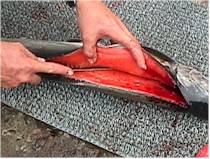
Your next step is to return to the head end of the
fish and make a shallow cut through the line of pinbones that extend from the
backbone ... be careful not to cut too deep and cut through the ribs. Some people start at
the tail end of this cut ... that works too ... whatever is easiest for you ... just make
sure to stay away from those ribs ... recovering from a goof here can be difficult. |
 |
|
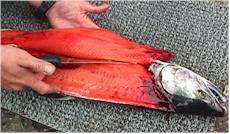
The next step is to lay the knife at a really shallow angle to the ribcage
and cut along the ribs ... cutting on the exact same lines as the rib
bones lay. Be careful not to cut a too steep of an angle ... you'll cut through the ribs.
Pull the fillet back with your hand as you cut. Continue until you run out of meat in the
belly area ... then make a cut through any rib bones that may still be attached to the
belly area. You should now have a complete fillet on one side still attached to the belly.
|
 |
|
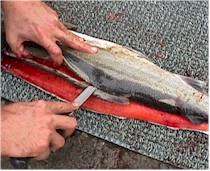
Your next step is to turn the fish over and
face it the other direction. Make sure to place the fillet you cut from the other side
under the fish as if it was still a whole fish. Notice the positioning of the fish in this
picture compared to those above. Then you simply repeat the steps we took you though above.
|
 |
|
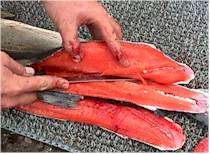
You'll see as we make the cut through the pinbones on
this side, we start from the tail area and work back to the head ... as we said before, some
people like to do this ... we find it easier to do it this way on this side as
we find it
easier to keep the knife at a shallow angle while pulling towards me. |
 |
|
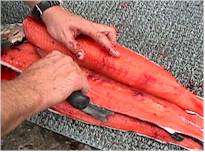
Cutting along the rib bones on
the second side ... this can be especially tough if dealing with a mature hen ... this
is where a non-slip mat pays off big and you'll find it necessary to keep the fish from
moving around and rolling off the egg skeins. You'll see when you try it! |
 |
|
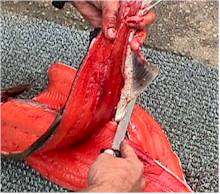
When you complete the filleting on this side of the fish, you will
still have an area around the anal fin and vent that has to be cut away from the fillet
section ... we find it easiest to lift the tail as shown and cut through the skin and flesh
that is still attached to the fillet. |
 |
|
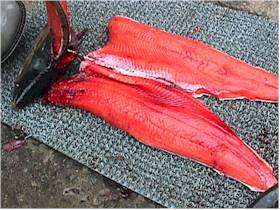
This is your finished product.
You can cut through the belly meat on each
side to produce two separate fillets with a piece of belly meat ... or leave
it as is for your next party!
Enjoy, and remember to only keep what you
need! Carefully return the rest back to the river to help preserve our
fishing opportunities!
|
 |
|
